Tuesday, September 27, 2016

New Belt Buckle

 
"Crypt of Wanton Riches"


"Crypt of Wanton Riches" - Detail with open gates.


"Crypt of Wanton Riches" - Rear of piece.

This sculptural belt buck features a cast bronze archway with functional hinged sterling silver gates. The gates open to reveal 27 bead-set natural yellow sapphires and 10 bead-set cognac diamonds scattered among the chaotic bronze forms. This piece was an absolute joy to work on, as I was able to implement my expanding stone-setting capabilities gained through working for years as a traditional bench jeweler in service of my own creative and artistic vision. Also, I was finally able to utilize a bronze belt buckle casting from several years ago that was never properly finished, with the sprues still evident from the casting process and the back not properly ground down and polished. The sterling silver gates were cast from scale architectural model parts several years ago, and the result was an incomplete casting due to the thin nature of the vertical bar elements. This left me in the strange position of absolutely loving the imperfections within the castings, but being creatively paralyzed about how best to use the castings in a piece knowing full well that I likely could not achieve such a delicate balance of imperfection again even if I tried. Once again, time and experience has proven to be the greatest mediator of technical skill and creative vision.

Friday, September 16, 2016

New Sculpture

"Closures #2"


2016
15"H x 12"W x 4"D
Steel, Cast Iron, Bronze, Copper, Aluminum, Brass

This companion piece to "Closures #1" is an interpretation of the complex thought processes and logic structures found within one's unconscious mental landscape as methods of control within both society and the physical space on encounters.

This piece was started many years ago along with it's matching wall-piece "Closures #1", but was never completed. I had cast the main circular iron forms during an iron pour at RIT, probably around 2007 or 2008, and welded up the main steel structures in the spring of 2008, in the last few weeks of my senior year. The idea behind the pair of wall-mounted sculptures was there, but they always seemed lacking an additional element or component, and thus were never completed. Then, while in grad school at ECU several years later, the aluminum hatch or seal structures were found in a junk shop near the North Carolina coast. The idea crystallized in my mind to have the units bolted somehow to the steel panels and have some objects of significance suspended on the brass chains. Fast forward a few years to the present, and the critical eye and attention to detail that I was forced to hone as part of my responsibilities as a full-time bench jeweler allowed me to finally approach and complete the pieces. Finishing a piece correctly and thoroughly, with thought given to the proper means of patinea, preservation, and display has always been a weakness of my creative production, but with time and maturity I have finally put that demon to bed. I am very pleased with how this piece and it's companion turned out, and look forward to displaying them together.

Friday, September 9, 2016

New Jewelry Work

It has been a very long time, probably about 6 years, but I am finally getting back to making art jewelry and sculptural jewelry forms. Below is the first of the two new pieces I have just finished, with a bit of the process and journey behind it's creation.


“Volatile Emotional Response Array”
Sterling Silver, Pine, Wax
11.5”H x 6”W x 1”D (Main Pendant) – On 27” Chain
2016

This piece began its long journey to completion in 2008 or 2009, during one of the first mid-semester critiques for my first sculpture studio course in graduate school. Those who were in that critique may recall my reaction to the experience. Suffice it to say, I experienced a range of emotions during the discussion of ideas and artistic concepts that followed, and not all of them were pleasant or conciliatory. One thing led to another, and I found myself whittling a strip of scrap wood I had found on the floor of the sculpture studio classroom with my pocket knife into a variety of knives, shanks, and other sharpened instruments. Towards the end of the critique I found a length steel binding wire laying on a table, a leftover from another student's pursuit of the artistic dream. After a few careful twists of my knife, the carved forms had holes bored through their handles, the wire was fashioned into a loop, the objects were strung and secured with a few twists of the wire ends, and an honestly crafted art object was born. 

This key-ring or bundle of shanks has hung prominently in every studio, office, and work space I have used ever since, and most often was displayed alongside another one of my most favored objects, a heavy card-stock radioactive waste tag, a memento of my time many years ago working as a lab assistant in a bio-medical laboratory. With its bold black lettering and an understated yet still striking red radioactive symbol contrasting strongly with the bright yellow background of the tag, it always seemed the perfect complement to the ring of shanks, and the two were intrinsically linked in my mind for years.

Now, in 2016, I found myself looking back at all the objects I have collected, the parts and units I have disassembled, modified, and altered, and the pieces I had begun to work on but never fully finished. One of the main challenges I have experienced in the past with completing a work of art, be it jewelry or sculpture, is the gravity and power I give to each object in my mind and my fear of being so in love with a form or unit that I cannot resolve the best solution to use it in a piece.This is particularly true for very unique pieces that I found or created by chance or luck. The pressure to choose the Right way to use an element, with the knowledge that I may never be able to find, acquire, or make another one like it ever again, prevents me from using it at all.When one is so wrapped up in the possibility of a piece and the myriad ways to resolve the visual, technical, or aesthetic problem at hand, it can be paralyzing. 

It is a gratifying experience to revisit a piece or object from ones past that had heretofore proven stubborn, difficult, and elusive, only to now find the answer clear and the resolution manifest. I could never make the ring of shanks a finished piece because I could never figure out how to display the radioactive waste tag with the ring without the composition being muddled or taking away from the visual and emotive strength of either object. The moment of clarity occurred when I realized that it was not the physical tag itself that was permanently linked to the ring of shanks, but rather the idea or concept that the tag implied, that of some unseen entity or power, no longer visible to the viewer yet still powerful and potentially damaging long after the initial danger had subsided, a lurking dread in the darkened corners of ones mind. With the judicious application of a blowtorch, some paste wax, and a fabricated sterling silver ring with a stationary heavy-link chain attached to loops, the piece was completed. And so it goes.


"A moment of complete happiness never occurs in the creation of a work of art. The promise of it is felt in the act of creation but disappears towards the completion of the work. For it is then that the painter realizes that it is only a picture he is painting. Until then he had almost dared to hope that the picture might spring to life. Were it not for this, the perfect painting might be painted, on the completion of which the painter could retire. It is this great insufficiency which drives him on. Thus the process of creation becomes necessary to the painter perhaps more than is the picture. The process in fact is quite habit-forming."

- Lucian Freud, "Some Thoughts on Painting", 1954


Monday, August 29, 2016

DaDa Soiree: An Absurd Art Show Opening


I am very pleased to announce that 2 of my sculptures were accepted into the "DaDa Soiree: An Absurd Art Show", held at C3 Lab, a co-working, artist, and maker-space here in Charlotte, NC. The exhibition, created and organized by artists April Marten and Amanda Medina, will feature the work of 60 artists, including visual artists, installation-based works, and performance art, all in the spirit of the DaDa art movement and the Avant-Garde.

The opening night and reception is this Friday, September 2nd, from 7:00-10:30PM. The exhibition runs through September 16th, during normal Gallery C3 hours, which are 9:00AM - 5:00PM weekdays, and weekends by appointment. 

The Gallery is located at 2525 Distribution Street, Charlotte, NC, 28203 

https://www.facebook.com/events/1016502728403880/


Monday, August 8, 2016

Edwardian Brooch Repair

During the course of my daily work as a bench jeweler and goldsmith, I do a lot of basic repairs such as ring sizing, clasp replacement, earring modification, and general refinishing and refurbishment. I tend to work on a lot of basic, mass-produced jewelry and common everyday jewelry pieces, which is uninspiring and not mentally stimulating, but is good for keeping my hand skills and problem-solving capabilities well honed and sharp.

Every once in a while, however, a piece comes across my bench that is absolutely world-class and stunning, either due to its value, the materials it is made from, who made it, or the time-period from which it originates. These are the pieces worth taking the time to stop and appreciate, study their construction, and marvel at the technical and design challenges the original maker or makers had to overcome to create such a beautiful work of artistry. Then, of course, comes the challenging and rewarding task of completing the requested repair work or modification with a high enough degree of precision and skill to preserve the piece structurally and aesthetically, regardless of how simple or basic the required task may be.

This piece is an Edwardian gold brooch with 1 4.35mm Old European-Cut diamond,  82 1.1-2mm OEC diamonds, blue transparent leaded-enamel, and 14 2mm pearls, with an approximate declared value of $13,000. The Edwardian period spans from 1901-1915, and is defined by the reign of the king of England, Edward VII (1901-1910), and was the final jewelry period to be defined by a British monarch. Jewelers who rejected the Art Nouveau and Arts and Crafts styles took their inspiration from traditional 18th-century jewelry, often using the guirlande form, or decorative hanging ornament such as a wreathe or bouquet of flowers. It was purchased in England as an estate piece, but the client never wore it due to it being a heavy brooch and very delicate. The client brought in a gold fashion chain that she owned and requested that the pin-stem and catch be removed and the brooch converted into a pendant that could be removed from the chain so that the chain could be worn by itself if the client so desired.

 Edwardian Brooch (Front)

Edwardian Brooch (Back)

This is a very straightforward and easy repair, being that the shop I work in has a laser welder, which is perfect for welding on 2 14k yellow gold necklace slide bars onto the back of the brooch. The pin stem was carefully removed and the resulting rough areas were smoothed out and lightly polished by hand to blend in with the rest of the brooch. Attachment points for the bars were chosen based on the strongest points on the brooch based on how it was constructed and the size needed to allow the widest portion of the necklace and the thicker clasp ends to pass through. Once this was determined, the bars were made from 16 gauge wire and welded into place, the joints were burnished and shined up with a fine wire wheel, and the piece was cleaned lightly, with no ultrasonic or steamer being used to protect the fragile enamel, which was already broken and cracked in several places.

Chain Slide Bars Installed

Brooch on Chain

The completed Repair

Friday, July 29, 2016

Metalwork For Craftsmen


"The constructive use of leisure time is a necessary balance for a life of work, and planning for leisure hours is fast becoming a fundamental factor in our educational practices. To contrive a quiet place in heart and mind, to widen a life until it spreads beyond all human fear and fever, that is to touch the source of eternal peace." 
 
- Excerpt from the Preface to "Metalwork for Craftsmen"

The first jewelry or metalsmithing book I ever purchased was a 1972 Dover Publications reprint of Emil F Kronquist's book "Art Metalwork" originally published in 1942. I was probably in 4th or 5th grade, and found it in the clearance section of Barnes and Noble. While some of the information, in particular the sections on soldering and brazing, were outdated and relied on tools and technology no longer in use, it was still a solid introduction to basic metalworking processes. I particularly enjoy the simplicity of the illustrated panels, as they convey the processes beautifully without text or extraneous details.


Friday, July 8, 2016

Anatomy of a Repair: Part II

At this point in the repair process, the customer has been made aware of the extent of the damage and wear on their ring, and the necessary repairs were discussed and agreed upon. We will remove the new shank and two broken and cracked settings from either shoulder of the ring and install new platinum low-base heads that will be much more structurally sound, reattach the ring shank, and reset the side diamonds. Simple enough, right?

Not exactly. For all the planning and research that one can do prior to beginning a jewelry repair, there are always little details and minor logistical realities that can occur and turn a straightforward repair into a complicated, expensive undertaking.

Since the side low-base platinum 4-prong settings on the ring were already broken, it was an easy procedure to cut and grind off the remaining metal on the center head portion and smooth everything out with a fine grit rubber wheel. The more pre-polishing you can do prior to assembling heads and parts, the less difficulty you will have later on after everything is assembled. Often, the assembled parts will be arranged such that they block or restrict access to a particular area or inside corner for polishing, so pre-polishing parts will lead to only needing to touch up the solder seams with a fine wire wheel and then a bristle-brush wheel charged with polishing compound.

The new shank that had been previously installed was in good shape, and only needed to have the old laser-welded ends of the V-shank reground to remove all the old weld area. This is done mainly because one has no way of knowing if the correct welding wire was used previously, and if one welds over it without removing it, you are potentially changing the alloy of the metals you are welding together right at the weakest point of the structure, which can lead to weld failure.

At this point, all the original parts were prepped and pre-polished, and I was ready to order my new platinum low-base heads. This is where I hit my first major road block. The main supplier we use, Stuller, did not carry a platinum low-base head in the size that I needed, approximately 1.7-1.8mm. This was a surprise, as it is a very common style of head and has always been in stock in the past.

Ok, how about ordering a platinum tube bezel with a pre-cut bearing and carving the scallops by hand with a krause bur and a rubber wheel?  Nope, Stuller only carries platinum tube bezels down to 3mm. Why wouldn't they?

Gold and silver are far easier to manufacture and work with for a findings supplier, and so one will often run into issues finding the right part in platinum. Many parts are die-struck as opposed to being cast, and some styles of finding and some manufacturers have physical limitations on what metal they can make certain parts in based on their machinery parameters.

At this point, I might have tried finding the parts from other manufacturers and suppliers, but Stuller's selection is pretty comprehensive, and we already have an account with them and place orders daily. Also, a due date was already promised to the customer for the completed repair, and spending more time sourcing the parts from an unknown supplier had the potential to introduce even more variables and delays into the process.

Another issue with using pre-made low-base heads and tube bezels, assuming that I could have even found them in platinum in the right size, is that they are usually die-struck from relatively thin metal. This yields a light and strong setting that is also affordable because the manufacturer has reduced the metal weight to cut costs. However, in this particular case, the original heads that were in the ring had a very deep scallop on the sides, which gave the settings a very sculptural and delicate look. Normal low-base heads are fairly plain and simple, so I would have had to lower the scallop and add a bevel running down the side of the setting with a cylinder bur and rubber wheels to achieve the same effect. The issue with this is that in doing so I would drastically weaken the structure of the already lightweight setting, leaving it no stronger than the broken settings the ring already had.

The next best option to ordering the correct settings or making dangerous modifications to a pre-existing part was to fabricate them myself from heavy wall platinum tubing. This would allow me to exactly match the style of the original settings without compromising the structural integrity of the ring and without delaying the completion of the ring while I search for the right parts.

Guess what? Stuller does not carry heavy-wall platinum tubing in the size I need. Perfect.

After going through the process of hunting down every possible pre-made solution for the repair, my only option left was to order 12-gauge platinum wire and drill and carve the settings by hand. While time-consuming and more challenging than working with a part that already had a hole for the stones or pre-cut seats to fit the diamonds, the resulting settings are far stronger than anything I could have ordered from a supplier.

Once I had the platinum wire, I filed the end flat, drilled a pilot hole in the end with a small drill bit, cut the seat for the diamond with a setting bur, and carved the sides of the setting to match the curved scallops of the of the original rings undergallery design. Once completed, I polished the setting while it was still on the end of the wire, as it is much easier than trying to hold a tiny part against a buffing wheel and risk losing it entirely. I cut the setting off the wire at the appropriate length with a jewelrs saw and made a matching setting in the same manner.

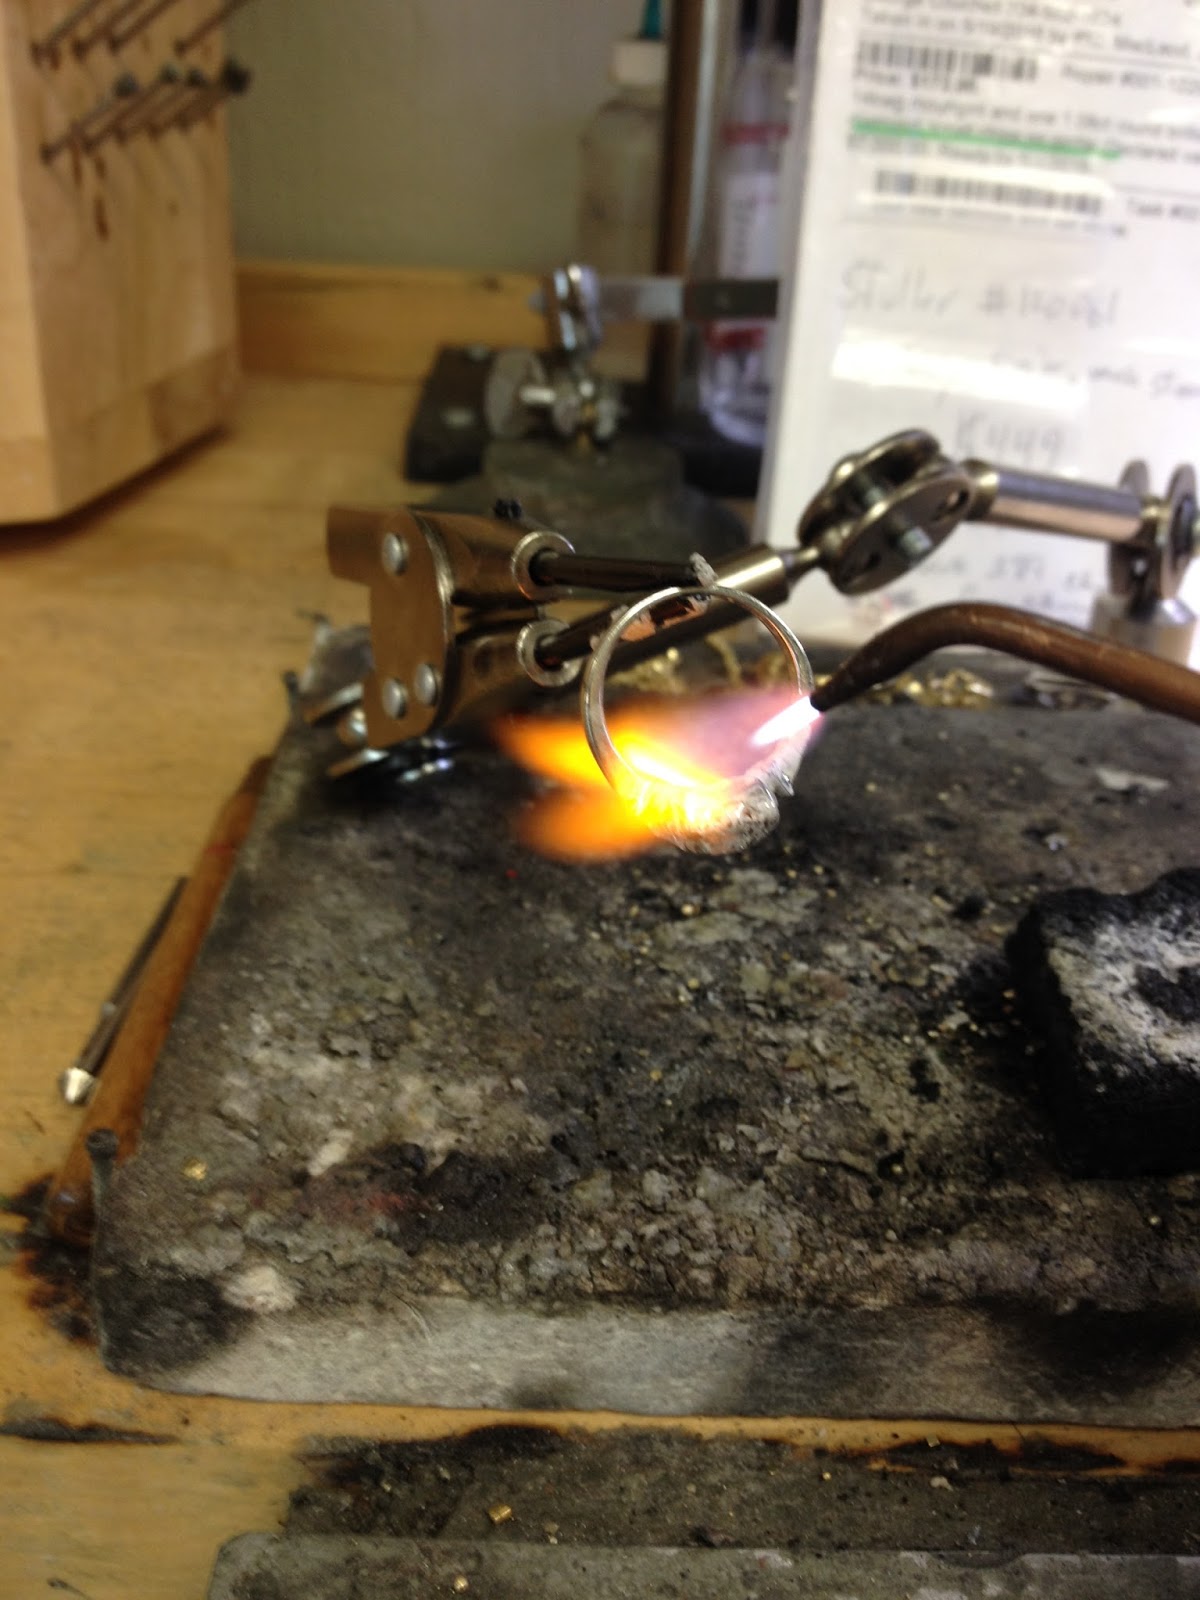
The parts were then tacked in place with a laser-welder and soldered with 20k white gold solder. Platinum solder was not really an option due to the proximity to the diamonds and the risk of unsoldering previous repair or assembly joints in the vintage top plate.

The ring was cleaned, the diamonds were set, everything was given a final polish, and another repair on a vintage piece of estate jewelry was completed.

 The original head plate, shank, side diamond, and raw platinum wire.

 Test-fitting the diamond into the hand-carved setting in the end of the solid platinum wire

 The two completed settings, cut off the wire stock and pre-polished, ready for installation.


 Soldering the settings in place between the shank ends and the central plate 
with 20k white gold solder.

 The completed repair. Note the scalloped design on the side of the central plate 
is echoed in either side accent diamond's setting.

Side view of the hand-made platinum settings installed with the 
original shank and vintage top plate.